
How to Build a Repeatable Weekly Video Repurposing Workflow
Quick answer
Quick answer
Learn how to turn repurposing from an improvised editing task into a predictable weekly production system with a practical multi-platform workflow, quality-control steps and

Table of contents
Explore VidRango platform workflows
YouTube Video Optimizer
Prepare your source video for long-form YouTube publishing.
YouTube Shorts Video Maker
Create a platform-ready YouTube Shorts version.
Facebook Reels Video Maker
Prepare a dedicated Facebook Reels version.
Instagram Reels Video Maker
Turn your source into an Instagram Reels-ready output.
TikTok Video Maker
Prepare a vertical TikTok version from the same upload.
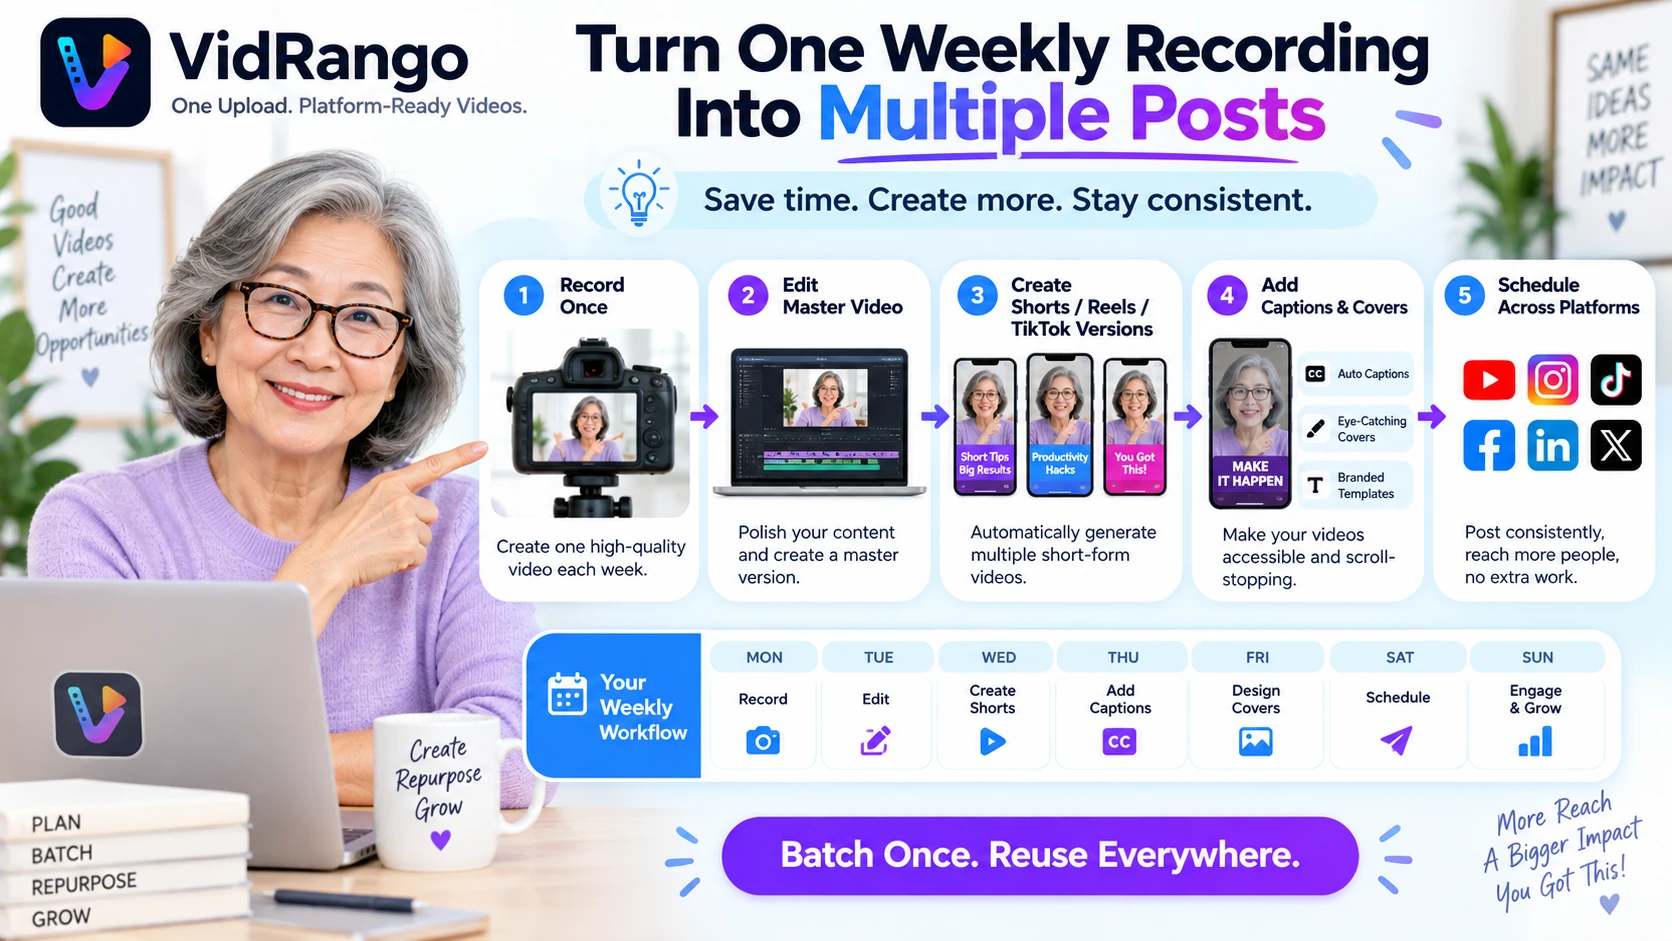
How to Build a Repeatable Weekly Video Repurposing Workflow is less about applying one universal preset and more about building a repeatable decision process. The practical goal is to turn repurposing from an improvised editing task into a predictable weekly production system. When that process is consistent, the same source can be prepared for more than one destination without turning every export into a separate editing project.
This guide focuses on the practical process behind weekly video repurposing workflow: what to check first, how to work through the file, which mistakes create avoidable rework, and how to finish with a version that is easier to publish confidently.
What to Get Right First
Before you render anything, decide what must remain unchanged and what is allowed to adapt. For this topic, the most important checkpoints are:
- Define one source-video intake step. Treat this as a deliberate checkpoint rather than something to notice after export.
- Standardize naming and storage before editing begins. Treat this as a deliberate checkpoint rather than something to notice after export.
- Decide target platforms before rendering outputs. Treat this as a deliberate checkpoint rather than something to notice after export.
- Batch captions, reframing, audio and branding checks. Treat this as a deliberate checkpoint rather than something to notice after export.
- Review all versions in one quality-control stage. Treat this as a deliberate checkpoint rather than something to notice after export.
- Schedule publishing only after files and metadata are approved. Treat this as a deliberate checkpoint rather than something to notice after export.
These checkpoints work together. A technically correct export can still feel wrong if the subject is poorly framed, the captions are hard to read, the audio is inconsistent, or the final file is confused with another platform version.
Step-by-Step Workflow
Step 1: Define one source-video intake step
Make this decision before moving to the next stage. The purpose is not to add more processing; it is to protect the viewer-facing result while keeping the workflow easy to repeat. After applying the change, compare it against the approved source so you can spot accidental cropping, quality loss, timing changes or visual clutter early.
Step 2: Standardize naming and storage before editing begins
Make this decision before moving to the next stage. The purpose is not to add more processing; it is to protect the viewer-facing result while keeping the workflow easy to repeat. After applying the change, compare it against the approved source so you can spot accidental cropping, quality loss, timing changes or visual clutter early.
Step 3: Decide target platforms before rendering outputs
Make this decision before moving to the next stage. The purpose is not to add more processing; it is to protect the viewer-facing result while keeping the workflow easy to repeat. After applying the change, compare it against the approved source so you can spot accidental cropping, quality loss, timing changes or visual clutter early.
Step 4: Batch captions, reframing, audio and branding checks
Make this decision before moving to the next stage. The purpose is not to add more processing; it is to protect the viewer-facing result while keeping the workflow easy to repeat. After applying the change, compare it against the approved source so you can spot accidental cropping, quality loss, timing changes or visual clutter early.
Step 5: Review all versions in one quality-control stage
Make this decision before moving to the next stage. The purpose is not to add more processing; it is to protect the viewer-facing result while keeping the workflow easy to repeat. After applying the change, compare it against the approved source so you can spot accidental cropping, quality loss, timing changes or visual clutter early.
Step 6: Schedule publishing only after files and metadata are approved
Make this decision before moving to the next stage. The purpose is not to add more processing; it is to protect the viewer-facing result while keeping the workflow easy to repeat. After applying the change, compare it against the approved source so you can spot accidental cropping, quality loss, timing changes or visual clutter early.
Once the steps are complete, export a final candidate and watch it from beginning to end. Check it at normal viewing size on a phone or laptop, because small previews can hide problems that become obvious in the real feed.
Common Mistakes to Avoid
- Starting every week with a different folder structure. This usually creates a problem that is faster to prevent than to repair after publishing.
- Editing one platform from scratch before planning the others. This usually creates a problem that is faster to prevent than to repair after publishing.
- Mixing draft and final exports. This usually creates a problem that is faster to prevent than to repair after publishing.
- Leaving QC and metadata until the last minute. This usually creates a problem that is faster to prevent than to repair after publishing.
The pattern behind most publishing mistakes is the same: a shortcut is applied globally even though the source changes from shot to shot or the destination changes from platform to platform. Build the workflow around reviewable stages instead.
Final Quality-Control Checklist
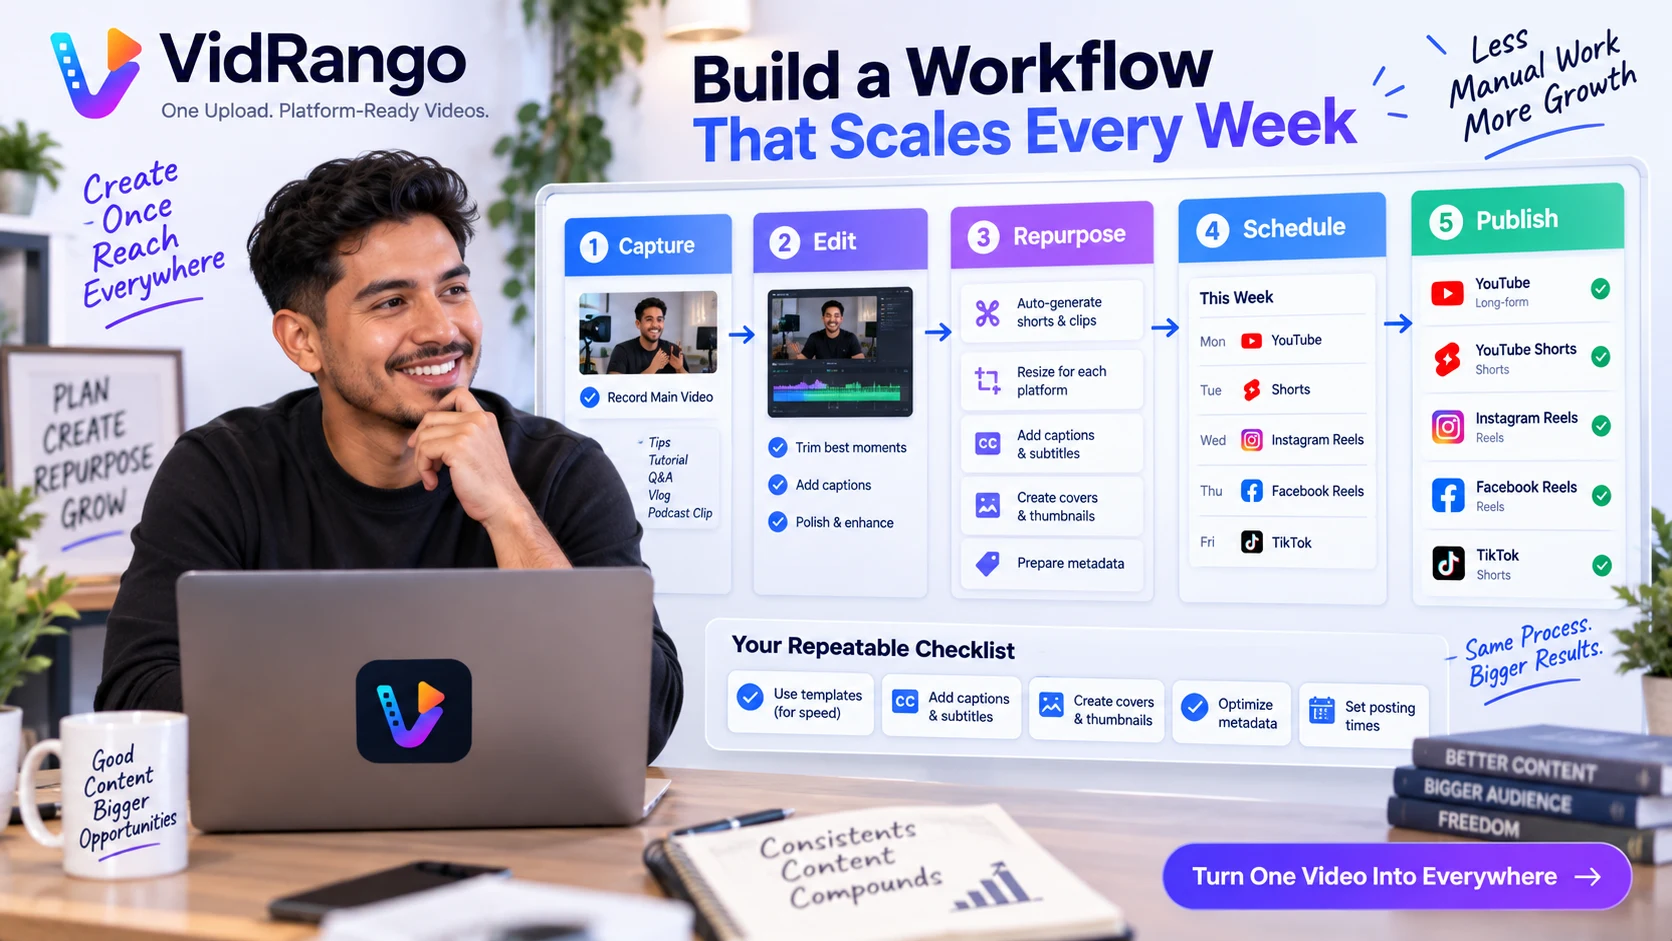
- The correct source and latest revision were used.
- The target aspect ratio, framing and resolution are correct.
- Captions, text and logos stay clear of important visual content.
- Speech is understandable and background music does not compete with it.
- The cover, title and metadata match the actual video.
- The finished export was watched from start to finish before scheduling.
How This Fits a Multi-Platform Workflow
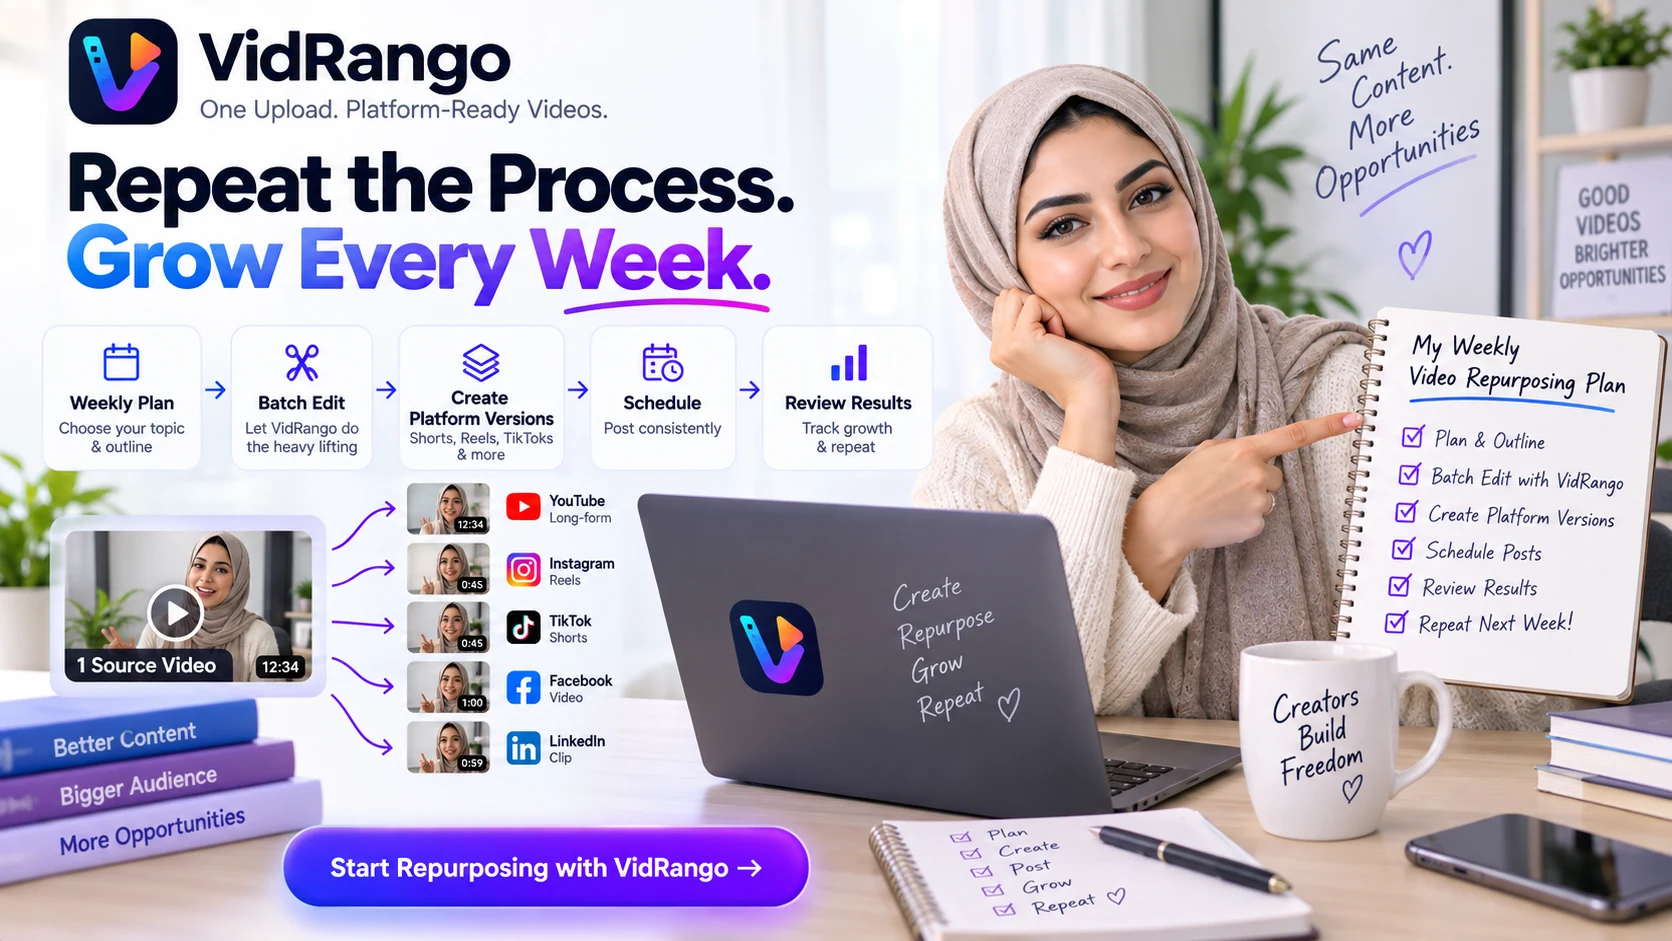
A good workflow for weekly video repurposing workflow should reduce repeated manual work without removing the final review that protects quality. VidRango is designed around one source upload becoming separate platform-ready versions, with reframing, captions, audio, branding and publishing assets handled as connected stages rather than unrelated edits.
If you want to see the workflow in context, explore VidRango workflow options and compare them with the way you currently prepare each platform version.
Related Reading
Frequently Asked Questions
What is the best starting point?
Start with the highest-quality approved source and define the target output before changing anything. Then work through the visual, caption, audio and metadata checks in order so you can trace problems back to a specific stage.
Can one source video be used for multiple platforms?
Yes. The source can stay the same while framing, captions, covers, metadata and sometimes intro or outro treatment change by destination. The safest workflow keeps one approved master and creates clearly named platform versions from it.
How do I know the final version is ready to publish?
Watch the exported file from start to finish, not just the editing timeline. Confirm that the subject remains visible, captions are readable, audio is balanced, branding is unobtrusive and the selected file matches the intended platform.
Final Takeaway
The most reliable way to approach weekly video repurposing workflow is to use a repeatable checklist instead of solving the same problems from scratch every time. Protect the source, adapt only what the destination requires, and make the final exported file—not the editing preview—the last approval point.
Keep exploring
Related VidRango guides and resources
Long-Form Video Metadata Checklist: Titles, Descriptions, Tags and Thumbnails
Learn how to package a long-form video so viewers and search systems can understand the topic before they watch with a practical multi-platform workflow, quality-control steps and
Vertical Video Publishing Checklist 2026: Format, Captions, Safe Zones and Metadata
Learn how to use a platform-neutral technical checklist before adapting the final details for each destination with a practical multi-platform workflow, quality-control steps and
Social Media Video Quality-Control Checklist Before You Publish
Learn how to catch framing, caption, audio, branding and metadata problems before a finished video reaches viewers with a practical multi-platform workflow, quality-control steps
Ready to simplify multi-platform publishing?
Upload One Video. Get Every Platform Version.
Prepare dedicated versions for YouTube, YouTube Shorts, Facebook Reels, Instagram Reels and TikTok through one VidRango workflow.